


Brand:Tiny's LEDs
EMAX TinyHawk & TinyHawk II FreeStyle VTX/RX Sled
EMAX TinyHawk & TinyHawk II FreeStyle VTX/RX Sled
Couldn't load pickup availability
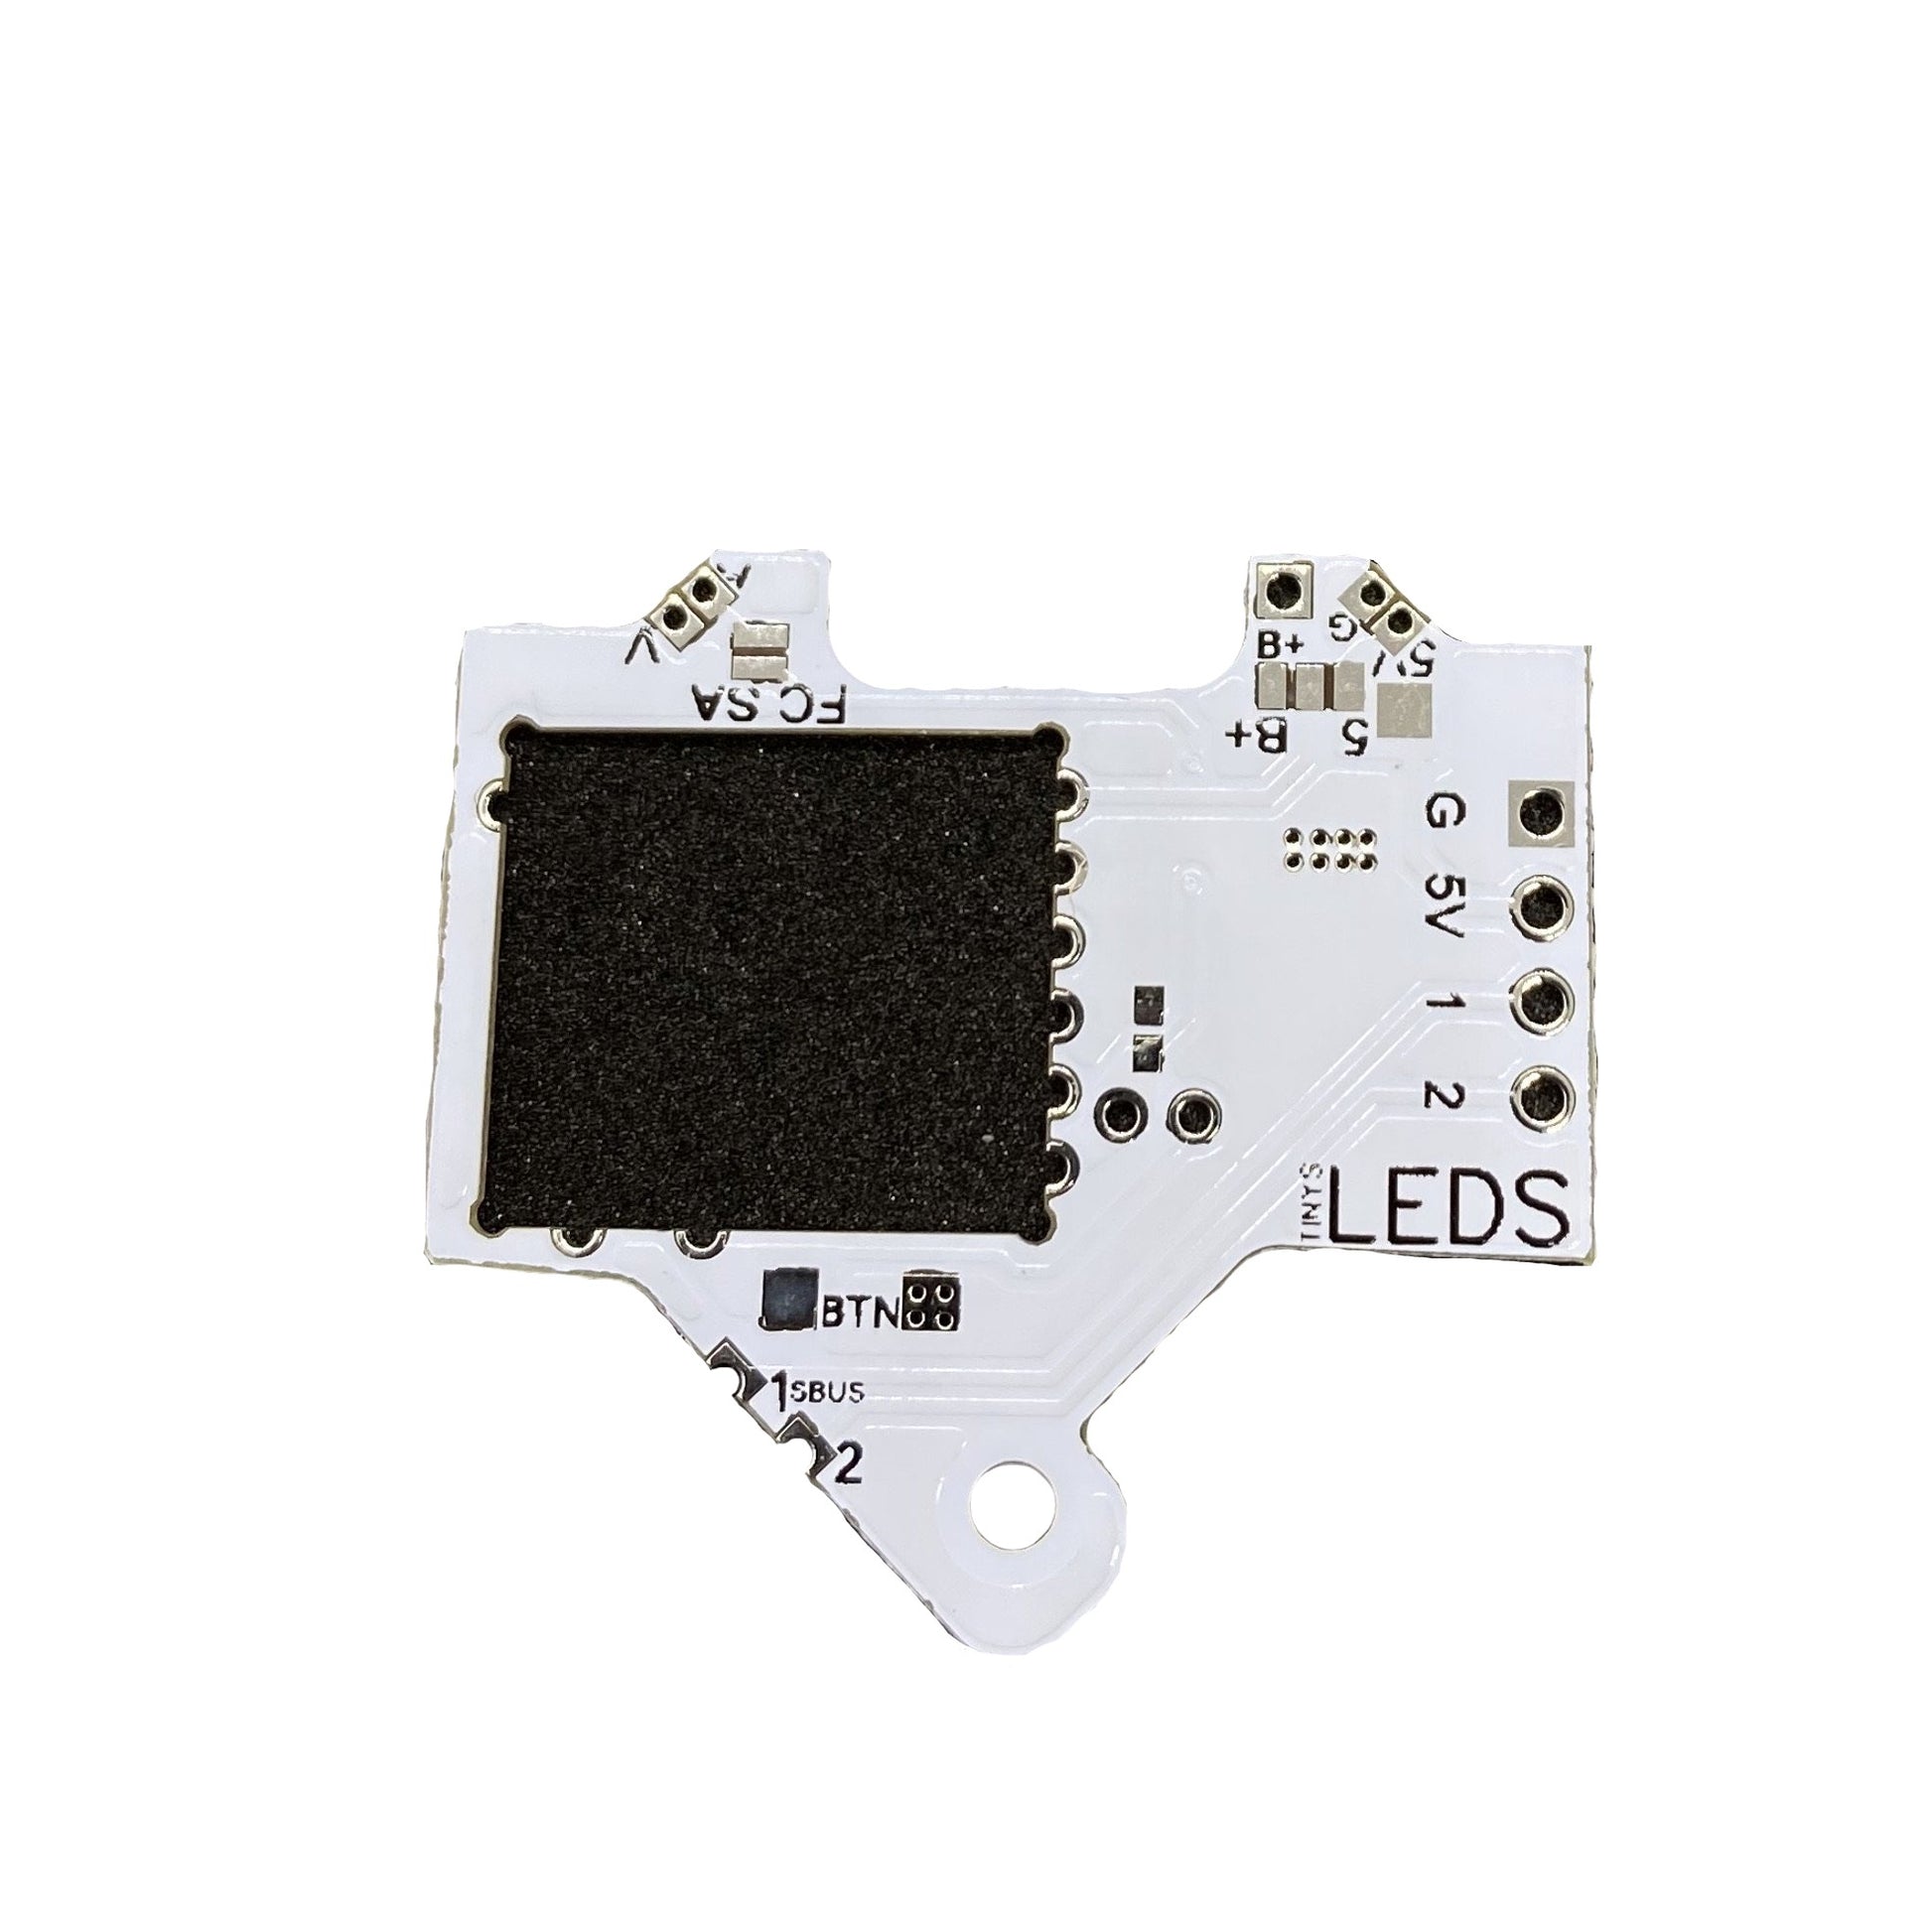
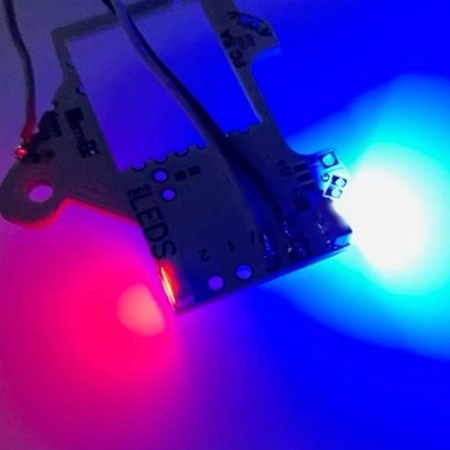
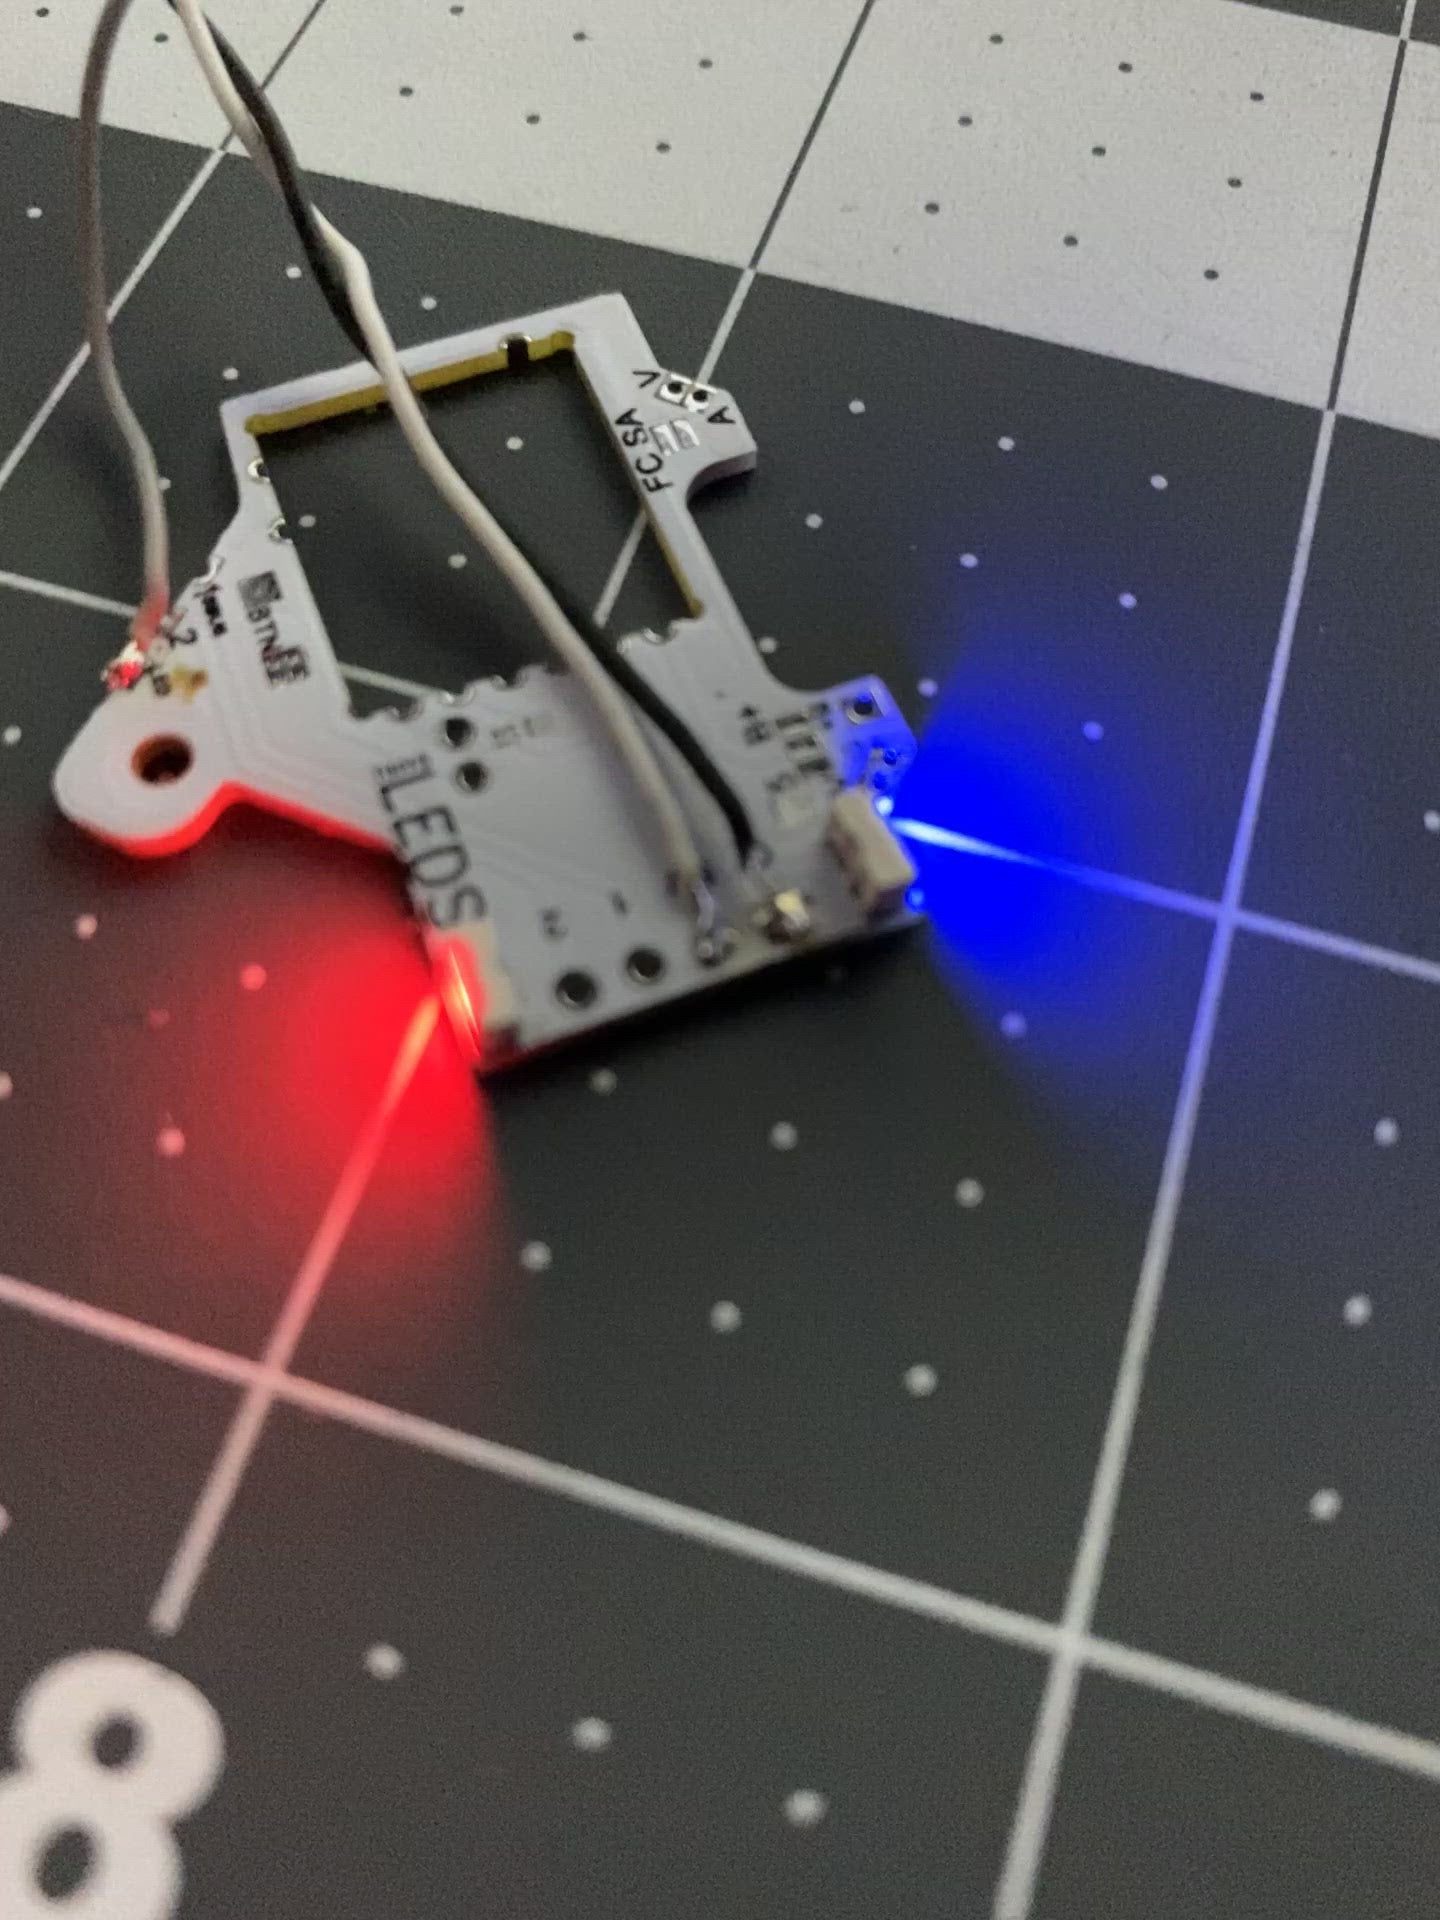
New Pro model has 2 side facing leds.
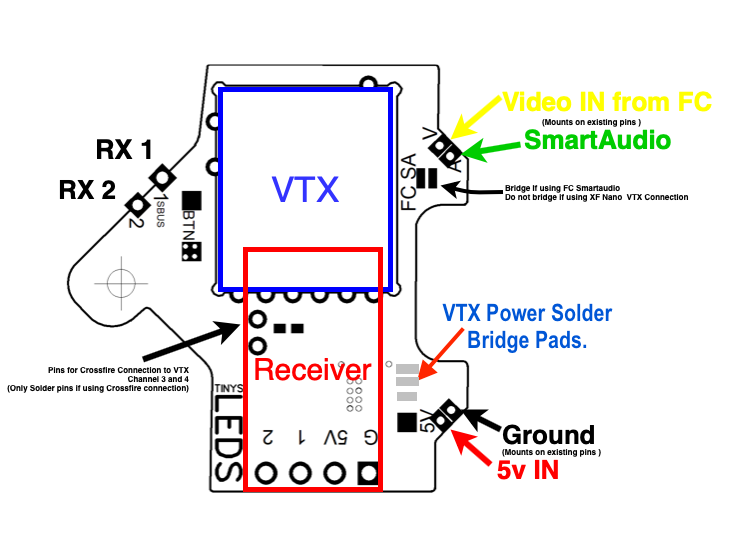
Setup asLED 0 and LED 1 in Betaflight. LED pad is on bottom of AIO. This must be wired for it to function.
Works with Tinyhawk and Tinyhawk II
NOTE:
New Boards now have a Solder bridge to select 5v or Battery Voltage on top. You must bridge one for power to vtx. If you bridge B+ connect the B+ to the Battery input + pad on main board. Bridge only one connection to center pad to power vtx. Refer to your VTX manual for approved operating voltage.

QUICK CLI Commands.
Use this for quick setup
Add this for SBUS RX:
set serialrx_provider = SBUS
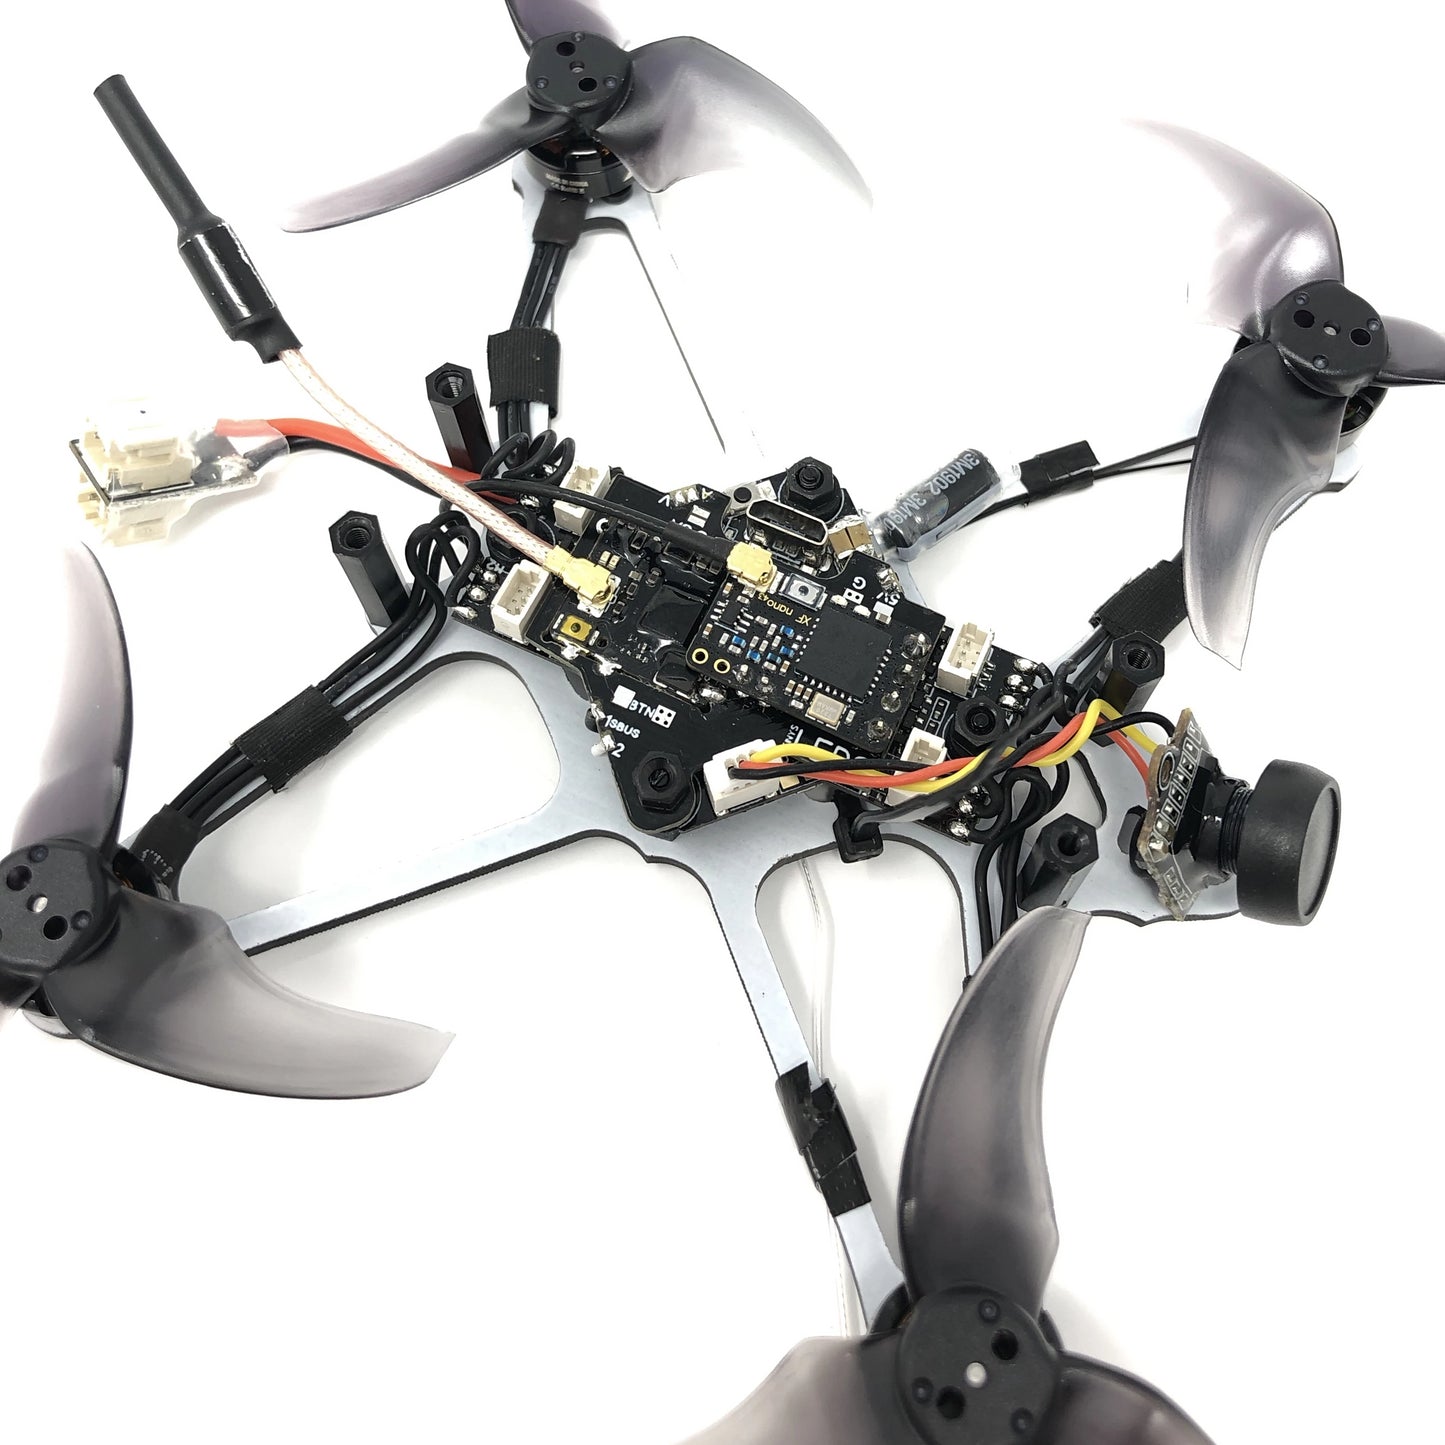
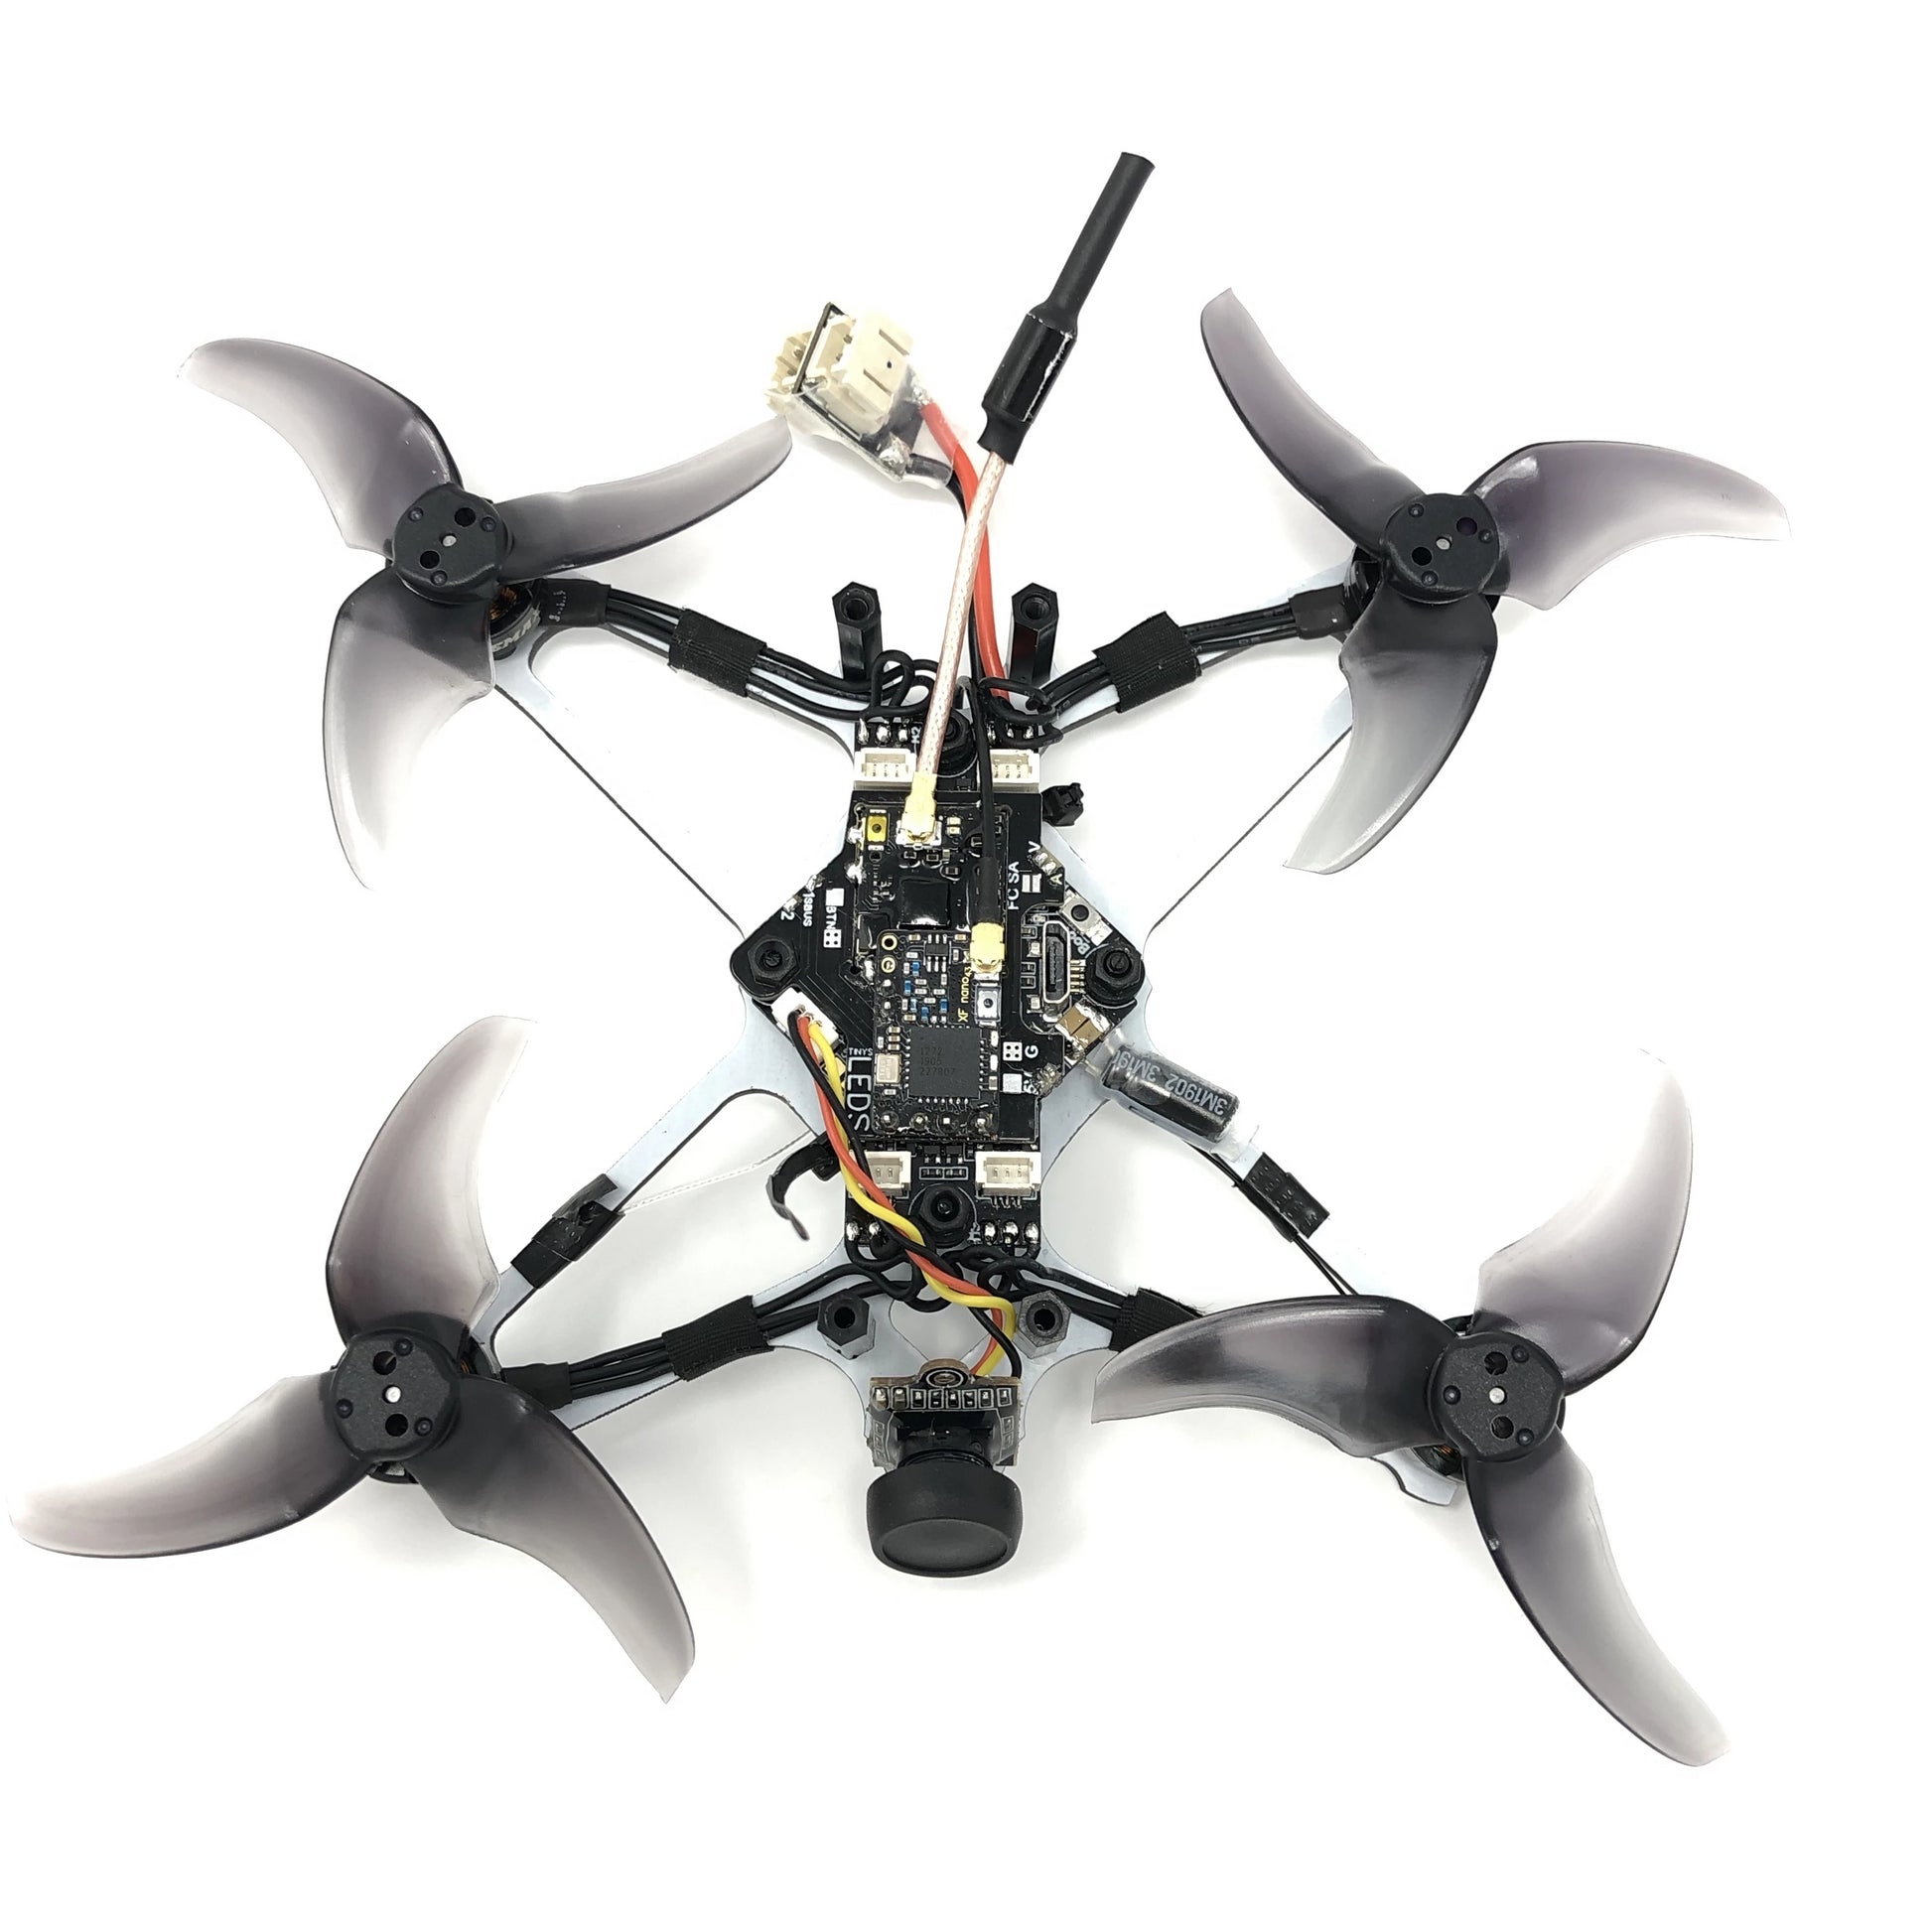
Free your EMAX TinyHawk Freestyle quad from short range. Installing this board will allow you to easily mount a RX and TBS Unify Nano VTX (Pro/Pro32) to the TinyHawk Freestyle.
Receiver compatibility: This fits any RX that has a pin spacing of 2.54mm. All TBS and ImmersionRC Ghost RXs are 2.54mm as well as most Frsky RXs. Express LRS Receiver ELRS receiver have some smaller receivers that will match up if you solder to the pads with pins. If you need pins for an ELRS rx please leave a note on your order or email back from your order confirmation. If nothing else small wires will work to clean up the traces to your RX.
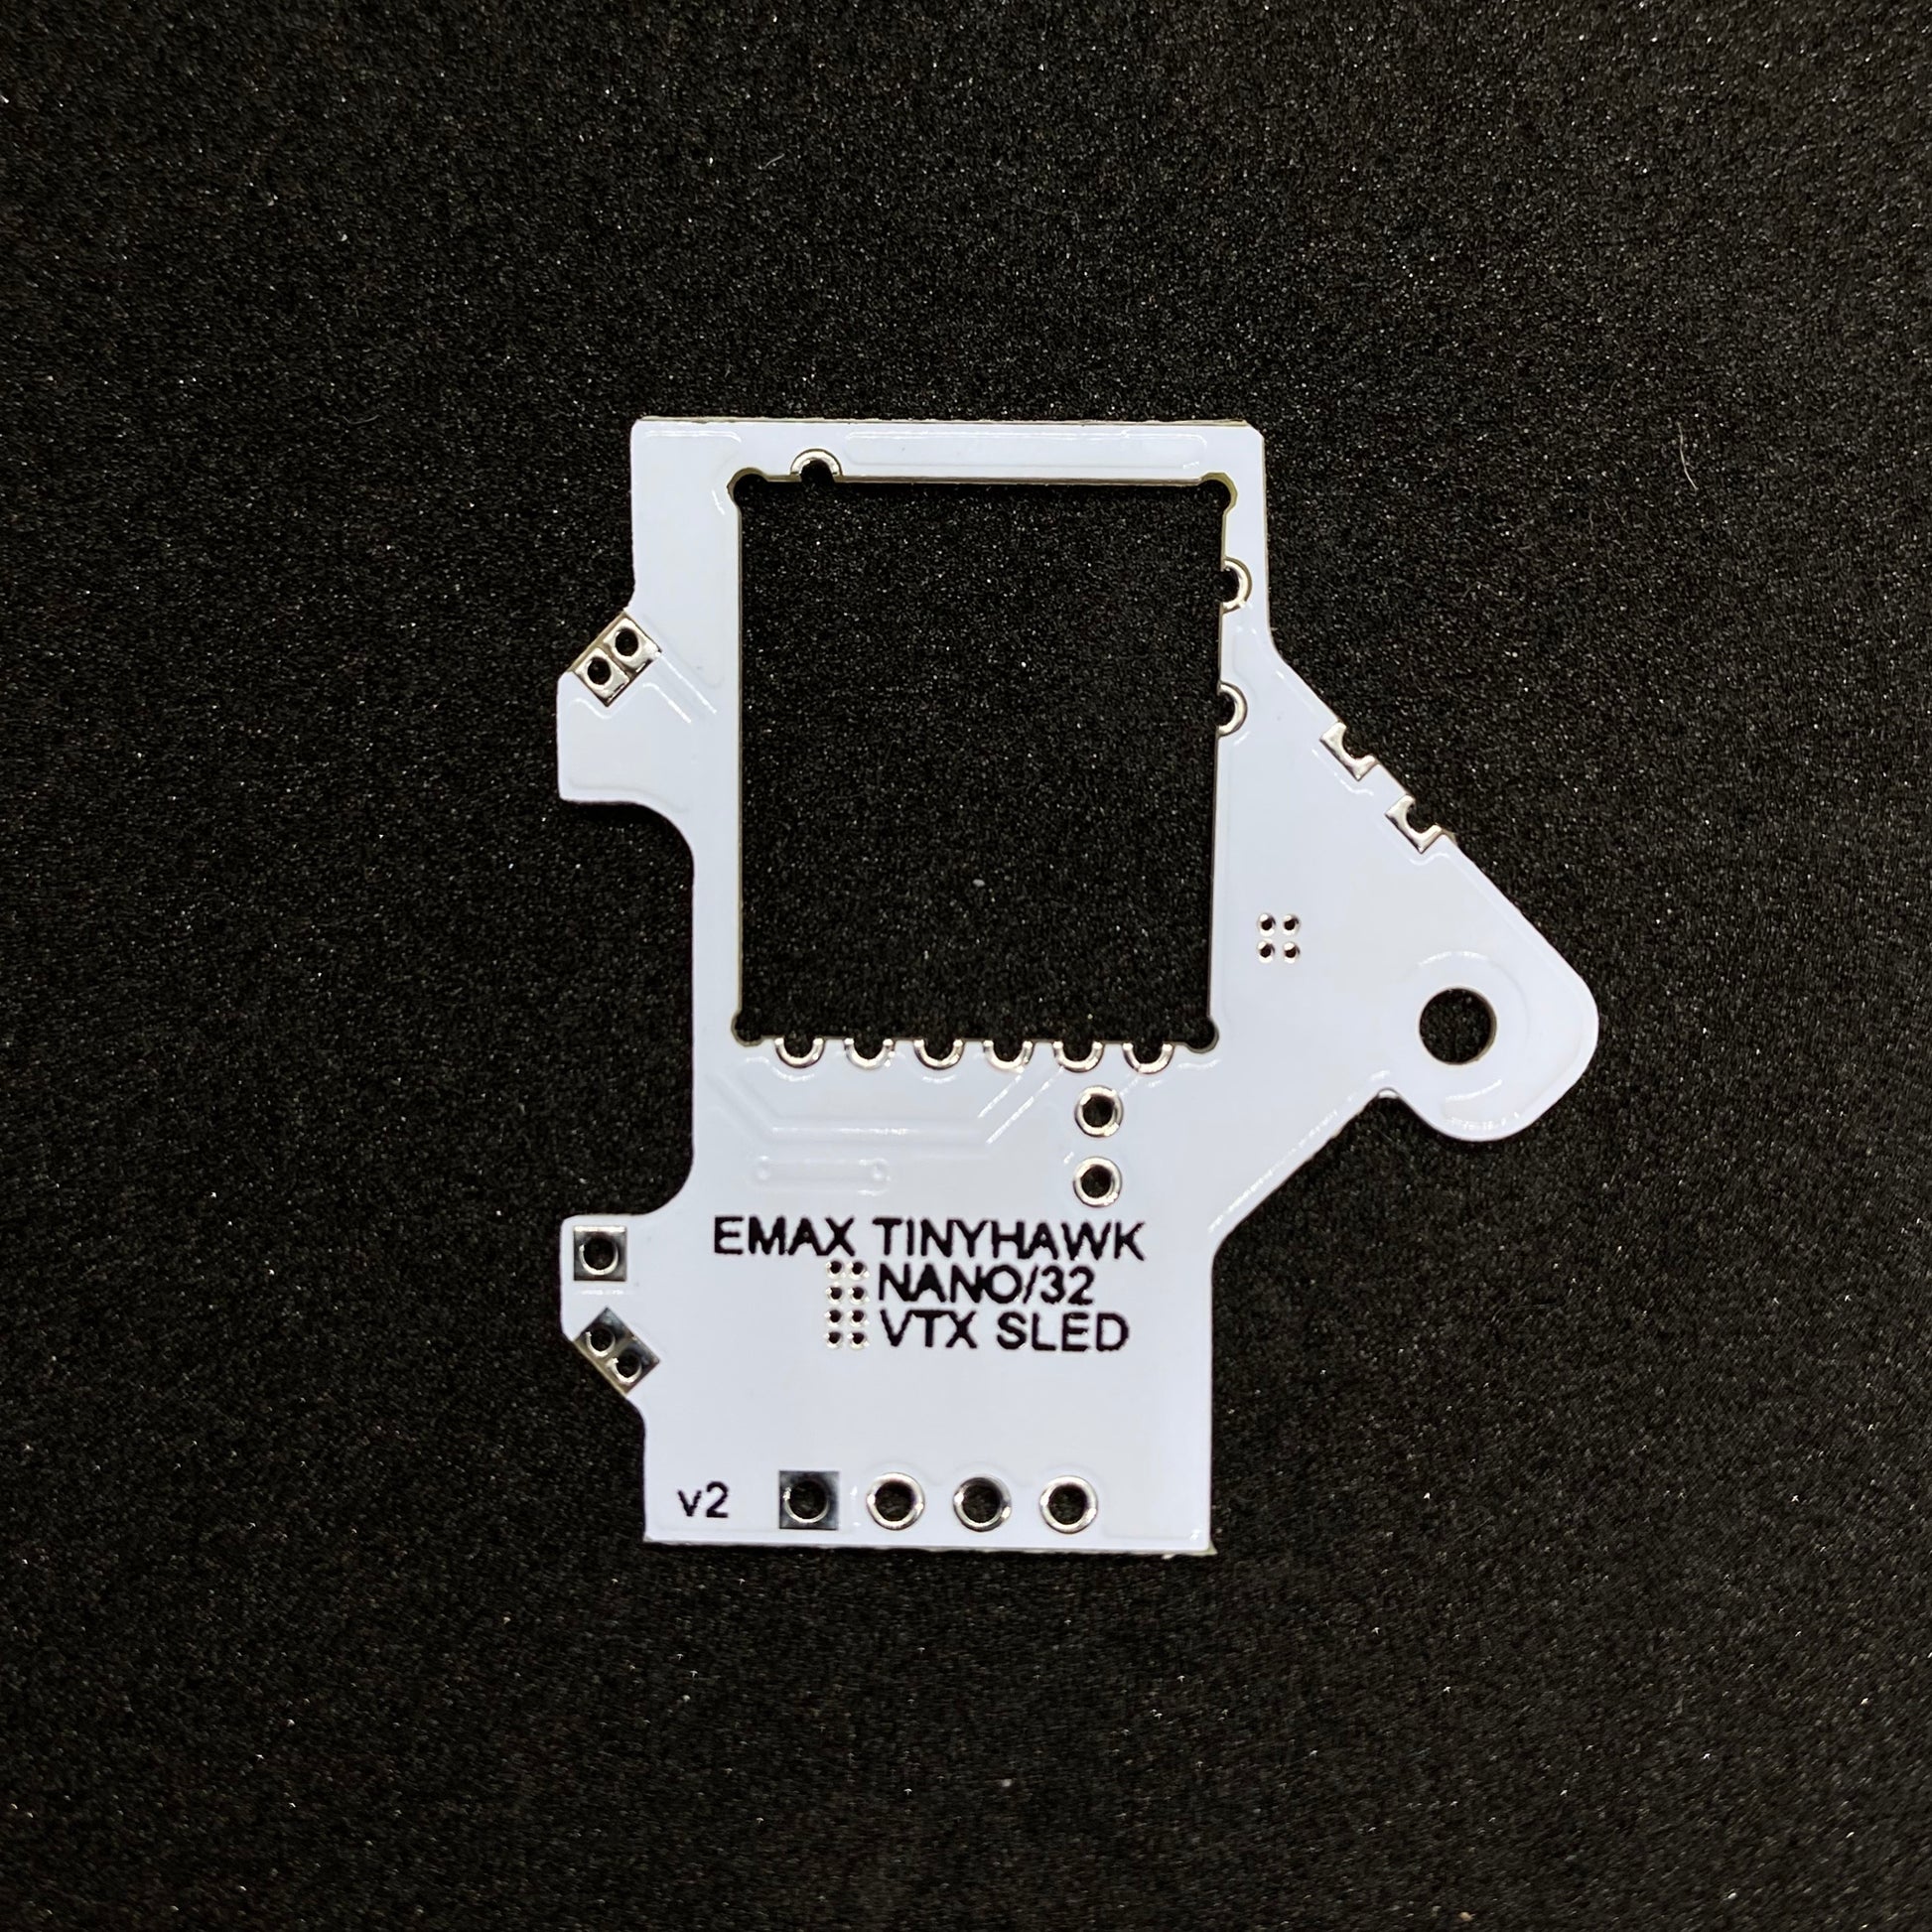
Note: the PCB is now White in color to match the bottom plate of the Tinyhawk.
Remove STOCK RX antenna if you are replacing it before install board.
This board mounts using existing PINS for stock VTX. Remove 1 of the plast spacers from each of the pins so there is only 1 remaining and then align holes on board and slide down. Unscrew nut on other side mounting board on the standoff opposite side of usb.
NOTE: Mounting RX. do not use the black spacers on pins. You will need to remove them after solder. The RX needs to be closer to main board. Check the distance until it if just above the VTX, about 1mm. Then secure the RX by soldering the pins. You may place a thin piece of VHB beneath RX to assist in mounting.
Use pins for Crossfire RX on CH3,4 to use Crossfire control.
Do not use pins on Ch3,4 if you wish to use FC Smart Audio. You must then bridge pads for FC SA, Setup TBS Smart audio on UART 2
Wire Pads 1 to the RX 1 and 2 to TX 1 underneath FC. Setup Serial RX on UART 1
Weight: .8 grams
Contents: 1x Mounting board
(no pins are included, use pins supplied with RX and VTX.)
Tiny hawk emax tbs teamblacksheep unify
Mounting photos & Directions:
Step 1: Remove old VTX, 3 ways, Use solder sucker to remove old solder. Use Solder wick to clean off pads. Clip the pins at the very top, closet to VTX.

Step 2: Remove One spacer from each set of pins.

Step 3: Remove Original RX antenna.

Step 4: Solder VTX to sled.

Step 5: Add Pins to RX area. ** Do not add 2 pins to right if you are going to use Smart Audio on FC. Pins are only needed if you are using Crossfire connection.**

Step 6: Remove spacers from RX pins.

Step 7: Solder RX to pins.

Step 8: Mount board on pins on FC and solder pins.

Step 9: Wire Pads 1 to the RX 1 and 2 to TX 1 underneath FC. Setup Serial RX on UART 1